Views: 0 Author: Site Editor Publish Time: 2026-08-25 Origin: Site


Solar lighting fails to deliver consistent illumination due to heavy weather dependence and limited battery life. On the other end of the spectrum, 120V line-voltage systems carry high electrical shock risks, demand rigid conduit, and require deep, disruptive trenching. Property owners and facility managers must balance aesthetic outdoor illumination with electrical safety, system scalability, reduced installation complexity, and long-term weather resilience. Achieving this balance requires moving away from fragile consumer-grade products and heavy-duty commercial line voltage, focusing instead on purpose-built low voltage infrastructure.
Deconstructing the mechanical framework of a low voltage landscape lighting system establishes clear criteria for evaluating components, sizing equipment, and mitigating installation failures before committing to a purchase or contractor. Understanding these mechanics ensures a resilient installation that adapts to landscape growth and seasonal changes.

Voltage Conversion is the Foundation: A low voltage landscape lighting system relies on a step-down transformer to convert hazardous 120V household current to a safe 12V or 24V output.
Capacity Requires Headroom: Transformers must be sized using the "80% rule" to prevent overheating and allow for future system expansion.
Voltage Drop is the Primary Threat: Successful system design hinges on matching wire gauge (e.g., 12/2 vs. 16/2) to the total run length and wattage to prevent dimming at the end of the line.
Modularity Ensures Longevity: Standard low voltage systems offer superior repairability; if a single fixture fails or the landscape changes, individual lights can be swapped or added without disrupting the entire network.
Smart Integration Involves Trade-offs: Upgrading to smart controls introduces convenience but requires evaluating modularity against proprietary ecosystem lock-in.
Table of Contents
Outdoor environments destroy electrical infrastructure. Moisture, direct ground contact, shifting soil, and landscape modifications create constant hazards. 12V and 24V frameworks serve as the standard because they handle the physical realities of exterior site management without putting people or property at risk.
Line voltage and low voltage differ primarily in their safety profiles. Operating at 120V carries a fatal shock risk if wires are accidentally severed during routine yard maintenance. Building codes mandate that 120V systems utilize rigid protective conduit and require deep trenching, typically 18 inches or more below grade. This process destroys existing root systems, disrupts hardscaping, and inflates project timelines.
Switching to a 12V or 24V output eliminates fatal shock risks. The current is weak enough that human skin provides sufficient resistance to prevent injury upon accidental contact. Low voltage significantly reduces installation complexity. Direct burial wire can be placed just below the surface or hidden under mulch. The low-voltage side of the installation often does not require a licensed electrician, depending strictly on local NEC codes, which cuts labor overhead.
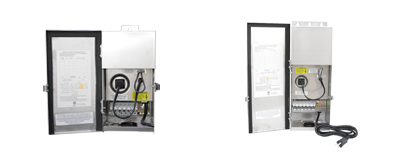
You cannot plug a 12V fixture directly into a standard exterior wall outlet. The step-down transformer acts as the central power hub of a low voltage landscape lighting system. It intercepts the 120V alternating current (AC) from your panel and magnetically reduces the amplitude of the electrical wave, outputting a steady, safe low voltage current.
Modern landscape lighting relies heavily on understanding the difference between AC and DC outputs. While the transformer steps down the AC power, many modern LED fixtures contain internal rectifiers that convert this AC power into direct current (DC) to drive the light-emitting diodes efficiently. This internal conversion allows fixtures to accept a wider range of incoming voltages without flickering.
Selecting the right voltage output depends entirely on the site footprint. 12V remains the absolute standard for residential applications, offering massive component compatibility. 24V is utilized for exceptionally long wire runs. Doubling the voltage halves the amperage for the same wattage, which minimizes voltage drop over vast distances.
Proper transformer installation requires following specific field procedures to ensure longevity and code compliance:
Locate a GFCI-protected exterior outlet with a weatherproof cover.
Mount the transformer housing to a solid wall or post at least 12 inches above ground level to prevent snow or standing water from reaching the vents.
Ensure adequate ventilation around the stainless steel housing to allow heat to dissipate during peak operation.
Leave a small drip loop in the main power cord so water runs off the wire rather than directly into the outlet.

Building a resilient outdoor network requires categorizing solutions based on material science and mechanical durability. The hardware you select dictates whether the system survives a single season or operates flawlessly for a decade.
The transformer core dictates the lifespan of the power supply. Magnetic transformers utilize heavy toroidal copper coils to step down the voltage. They are exceptionally heavy, highly durable, and better suited for outdoor temperature extremes. Because they lack delicate microprocessors, magnetic transformers are the standard for professional installations. They handle minor power surges with ease and rarely fail under heavy load.
Electronic transformers use internal circuitry and inverters to reduce voltage. They are significantly lighter, smaller, and operate quietly without the subtle hum sometimes associated with magnetic cores. However, electronic variants are highly susceptible to premature failure from power surges, lightning strikes, and heat degradation. For permanent outdoor installations, the weight and bulk of a magnetic transformer are worthwhile trade-offs for decades of reliability.
Power delivery relies on stranded copper wire wrapped in a UV-resistant, direct-burial PVC jacket. The standard wire types encountered in the field are 10/2, 12/2, 14/2, and 16/2. The first number indicates the American Wire Gauge (AWG) thickness, while the second number indicates the presence of two conductive strands.
Mapping wire gauge to specific outcomes is critical for system stability. 12-gauge wire serves as the baseline for primary runs. Its thicker copper core reduces electrical resistance, allowing power to travel further without degrading. Using 12/2 wire prevents the fixtures at the end of the line from appearing dimmer than those near the transformer. 16-gauge wire is noticeably thinner and is only suitable for short, low-wattage branches connecting a single fixture to the main line.
Wire Gauge (AWG) | Copper Thickness | Recommended Max Run (12V LED) | Primary Field Application |
|---|---|---|---|
10/2 | Thickest | Up to 250 feet | Heavy main lines on massive estates. |
12/2 | Standard | Up to 150 feet | Standard home runs from transformer to first fixture hub. |
14/2 | Medium | Up to 100 feet | Secondary branches off the main 12/2 line. |
16/2 | Thinnest | Up to 50 feet | Short jumps connecting a single fixture to a nearby hub. |
The illumination source determines both the aesthetic quality and the maintenance schedule of the property. Differentiating between integrated LED fixtures and drop-in LED bulbs reveals two distinct engineering philosophies.
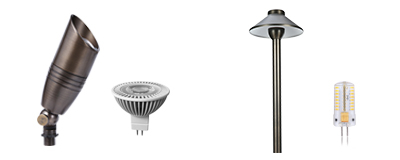
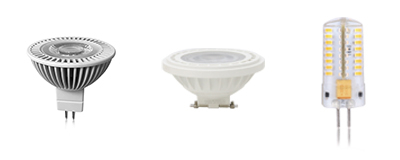
Integrated LED fixtures feature diode arrays permanently sealed into the housing. This design offers superior heat dissipation and completely locks out moisture, resulting in a much longer operational life. Drop-in LED bulbs utilize standard sockets, such as MR16 or G4 bases. While they are easier to replace if a specific color temperature change is desired, the removable lenses create potential failure points for moisture ingress.
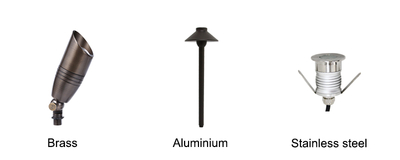
Material selection for the housing is equally vital. Cast brass or heavy-duty aluminum housings withstand impacts, soil acidity, and UV radiation. Consumer-grade plastic fixtures degrade rapidly, becoming brittle and cracking within a few seasons. High-quality metal fixtures emphasize repairability. They allow for simple, modular replacements if a light is damaged by a lawnmower, unlike proprietary integrated smart fixtures that may require full system updates or complete replacement when a single component fails.
Field installations typically rely on a mix of specific fixture styles to achieve balanced lighting:
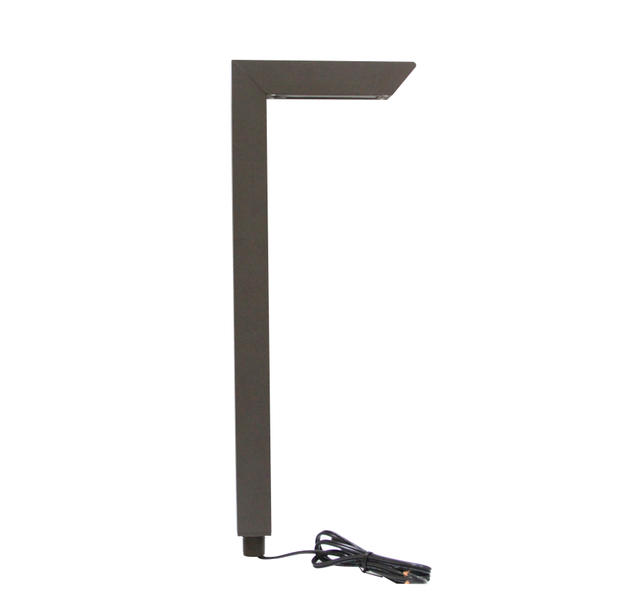
Path Lights: Cast light downward to illuminate walkways and prevent tripping hazards.
Up-Lights (Bullet Lights): Provide directional illumination to highlight architectural columns or tree canopies.
Wash Lights: Deliver a wide, soft beam to illuminate retaining walls or large garden facades.
Well Lights: Recessed directly into the ground to provide upward illumination without creating a visible physical obstruction in the lawn.

Engineering the system correctly ensures uniform light output and provides the necessary infrastructure to accommodate future property changes. Proper design prevents overloaded power supplies and dim lights.
Sizing the power supply requires strict adherence to the 80% Rule. The total fixture wattage connected to the transformer should never exceed 80% of the unit’s maximum rated capacity. This buffer prevents the transformer from operating at peak thermal limits, extending its lifespan and leaving room for landscape adjustments.
The calculation framework is straightforward. If a design calls for 10 fixtures, each drawing 5 watts, the total system load is 50 watts. Applying the 80% rule means you should not install a 50W transformer. Instead, the system requires at least a 75W to 100W transformer to operate safely and efficiently.
Voltage drop is the loss of electrical potential due to wire resistance over distance. As current travels down the copper wire, friction causes a gradual decrease in available voltage. If the voltage drops too low, the fixtures at the end of the run will dim, shift in color temperature, or fail to ignite entirely.
Modern professional-grade LEDs typically require between 9V and 15V to operate without flickering or dimming. To keep the entire run within this acceptable threshold, installers utilize multi-tap transformers. These advanced power supplies feature multiple output terminals, such as 13V, 14V, and 15V. By connecting a long wire run to a 15V tap, you push higher voltage down the line, ensuring that by the time the current reaches the distant fixtures, it has only dropped to a perfect 12V.
You can verify your system is operating within the correct voltage range by performing a simple field test:
Turn on the lighting system and let it run for ten minutes to reach normal operating temperature.
Set a digital multimeter to read AC voltage.
Test the voltage directly at the transformer terminals to establish your baseline output.
Walk to the very last fixture on the wire run, open the connection, and test the voltage at the splice. If it reads below 9V, you must switch to a higher voltage tap at the transformer or upgrade to a thicker wire gauge.
The physical layout of the wire dictates how evenly power is distributed across the landscape. Selecting the right topology minimizes resistance and simplifies troubleshooting.
Topology Type | Installation Method | Performance Impact | Best Use Case |
|---|---|---|---|
Daisy Chain | Wire runs sequentially from fixture to fixture in a single continuous line. | Compounds voltage drop at the end of the line. High risk of dimming on long runs. | Short runs with very few, low-wattage fixtures. |
Hub-and-Spoke (Star) | Main wire runs to a central junction point; individual equal-length wires branch out to each fixture. | Centralizes connections and equalizes wire length, ensuring uniform voltage delivery. | Large clusters of lights, complex garden beds, and professional installations. |
The Daisy Chain method is easier to install and requires less wire. However, it is structurally flawed for large properties. The Hub-and-Spoke method requires more planning and materials but guarantees that every fixture receives identical voltage, resulting in perfectly uniform illumination.

Balancing automation features with system resilience requires evaluating how technology impacts repairability and maintenance. While app-controlled lighting is appealing, it introduces distinct vulnerabilities into an otherwise bulletproof mechanical system.
The historical standard relies on mechanical or digital timers paired with dusk-to-dawn photocells. The photocell detects ambient light, triggering the system to turn on at sunset. The timer then cuts the power at a designated hour, such as midnight, to conserve energy.
This traditional approach offers massive advantages. It boasts zero network dependency, meaning your lights will function perfectly during internet outages or router resets. It provides fail-safe operation, low replacement costs, and universal compatibility across all transformer brands. When a mechanical timer fails, a replacement costs very little and takes two minutes to swap.
Smart systems introduce advanced capabilities, including individual zone control, precise dimming, color tuning, and complex scheduling via mobile apps. These features allow property owners to customize the ambiance for specific events or seasons.
However, the community consensus highlights a severe risk regarding modularity: proprietary lock-in. Smart transformers integrate the power supply and the communication hub into a single unit. If the smart hub fails due to a firmware glitch or a Wi-Fi hardware short, the entire system goes dark. Standard low voltage lighting allows you to simply add or replace a single light or timer without rebuilding the network.
The most resilient solution is a hybrid approach. Utilize a standard, heavy-duty magnetic low-voltage transformer, but plug it into a robust smart outdoor outlet. This grants you modular automation, allowing app-based scheduling and voice control, without sacrificing the core stability of the transformer. If the smart plug fails, you simply bypass it and plug the transformer directly into the wall.
Exposing common failure points in DIY and subpar contractor installations protects your investment. Most system failures are not caused by defective fixtures, but by poor execution in the field.
The number one cause of system failure is corroded wire connections. When copper is exposed to wet soil, oxidation occurs rapidly. Capillary action can even draw water up inside the wire jacket, destroying the fixture from the inside out.
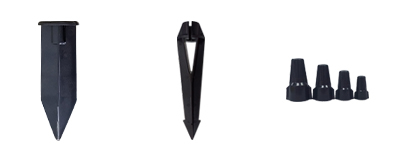
You prevent this by strictly following proper splicing techniques. You must mandate the use of silicone-filled, direct-burial wire nuts or heat-shrink crimp connectors. These components encapsulate the bare copper in a waterproof gel. Advise strictly against standard indoor wire nuts or quick-pierce connectors. Quick-pierce connectors inevitably separate as the ground freezes and thaws, exposing the copper to the elements and causing immediate voltage drops.
Execute a waterproof splice using the following method:
Strip exactly half an inch of insulation from the wire ends using a dedicated stripping tool.
Twist the exposed copper strands together tightly in a clockwise direction.
Insert the twisted copper into a silicone-filled wire nut.
Push the nut down firmly and twist clockwise until the silicone sealant oozes out slightly from the bottom, confirming a watertight seal.
Landscapes are not static. Trees grow requiring wider beam angles, new hardscaping is installed, and dark spots are identified after the initial installation. If the transformer is maxed out on day one, adding a single path light becomes impossible.
Discuss the reality of property upgrades with your contractor. Always recommend purchasing a transformer with at least 40-50% excess capacity. The marginal cost increase of a larger transformer upfront is negligible compared to the expense of ripping out and replacing an undersized unit two years later.
While low voltage systems bypass the strict 18-inch trenching rules of line voltage, they still require protection. NEC requirements for low voltage wiring typically dictate 6 inches of burial depth. This depth protects the wire from standard lawn aeration and light gardening.
Practical mitigation goes beyond simple burial. When routing wire through high-traffic areas, under walkways, or across garden beds prone to frequent digging, run the wire through gray PVC conduit. This physical barrier protects the system from accidental severing by shovels or edging tools, ensuring the structural integrity of the network remains intact for years.
Map your property to identify critical illumination zones and measure the exact distance from the exterior outlet to the furthest fixture.
Calculate your total required wattage by adding up the draw of all planned fixtures, then apply the 80% rule to select the correct transformer size.
Consult with a certified lighting designer or electrical contractor to finalize the wiring topology, ensuring you use the hub-and-spoke method for uniform voltage distribution.
Source silicone-filled direct burial wire nuts before beginning any installation to guarantee waterproof connections.
For projects requiring reliable outdoor lighting solutions, Radar Lighting provides professional lighting products and solutions designed to support diverse landscape and exterior lighting applications. By combining appropriate fixtures with well-planned low voltage system design, users can create outdoor lighting installations that balance illumination performance, durability, and long-term usabilit
A: No. Modern systems utilize highly efficient LED technology. An entire standard residential setup with ten to fifteen LED fixtures often draws less than 60 watts total. This means an entire property can be illuminated using less electricity than a single traditional 100W incandescent light bulb, keeping utility costs extremely low.
A: Yes. Because the system operates at a safe 12V or 24V, it is highly DIY-friendly and eliminates the fatal shock risks associated with household wiring. It reduces installation complexity significantly. However, professional design is highly recommended for large properties to properly manage voltage drop and complex wiring topologies.
A: Yes. As long as the voltage requirements (typically 12V or 15V) and the AC/DC specifications match the transformer's output, standard fixtures are highly modular and brand-agnostic. You can seamlessly connect a brass spotlight from one manufacturer and a path light from another on the same wire run.
A: A professionally installed system using high-quality cast brass fixtures, heavy-gauge wire, and a magnetic transformer will easily last 10 to 15 years, often longer with basic maintenance. Conversely, consumer-grade plastic fixtures and electronic transformers typically degrade and fail within 3 to 5 years.
A: An overloaded transformer will exhibit several clear symptoms. The internal thermal breakers will frequently trip, shutting the system down. The unit will overheat, the connected lights may flicker or appear exceptionally dim, and the transformer will suffer premature mechanical failure due to constant thermal stress.
A: Yes. The transformer must be plugged into a 120V GFCI-protected exterior receptacle. Furthermore, building codes require this receptacle to have a weatherproof "in-use" cover (often called a bubble cover) to protect the connection from rain and snow while the transformer is plugged in.